Pointing all four wheels the same direction is the way to find consistency and speed. Often I am asked what will happen if the rear end is out of square or if the bump steer is out of whack. The answer is, “I have zero idea”. When adjustments in your car are not right – there is no way to predict what will happen. I imagine the car will be erratic and it is likely it will feel different every time you get close to a corner. When you get to the track your car should be prepared. Completing every adjustment to your specs gives you the confidence to change wedge, stagger, shocks and springs without worrying if the car is loose because the rear end is crooked. Having the car set up with your numbers recorded is a needed part of your team’s efforts to build more speed each week and over the course of the season.
After a dominating performance in Phoenix, regarded engine guru Jim McFarland asked me, “So Jeff – your team just won the race. Do you really know how you did it?” Jim asked me this at the point in my career where I was starting to see success and was eager to learn. His simple question had a profound effect on me and I continue to learn from the question in the racing arena, in business and life in general. What Jim meant was that while it is great to celebrate a win, “do you know how you won and could you repeat the steps necessary to do it again?”
Jim taught me that having a plan that is sustainable is the way to increase the learning curve and was the key to ongoing success. Jim’s message was to enjoy success in the short term while understanding the adjustments and set ups allowing you to win again. We have all seen a one hit wonder and it is likely that those teams didn’t take the time to answer Jim’s question. Understanding your choices creates long term successes whereas winning by accident is like putting a monkey at a type writer until he spells a word. Keep the monkey off your back by understanding your chassis decisions. The concept is simple – plan to win. Plan to win in a repeatable fashion.
A set up plan will help you to build a race winning effort. In order to perform the set up routine the car needs to be completely ready to race. Full of fuel, everything done, full of oil, lead bolted down. Basically – after you finish the set up routine, the car goes in the hauler. When you reach the track it is ready to roll out of the hauler and onto the track. All fabrication projects are done and all projects are finished. Race ready means just that – ready to race.
I make sure everything is wrench tight before I take any measurements. At times crews measure with jamb nuts or bolts loose to speed the measuring process. When bolts/jamb nuts are tightened they can move rendering your measurements useless. It takes only seconds to loosen bolts/nuts and all measurements need to be taken with your components wrench tight.
Here is how I go about setting up an Asphalt Late Model in the order that I feel is best. I perform the set up process the same way each time and the car doesn’t leave the shop until my numbers are exactly right and written down. You may have another type of car but the concepts likely to be similar if compensate for your specific kind of racing.
Bump Steer Gauge
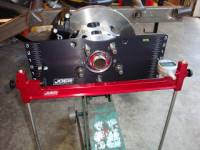 With the caster/camber, track width and toe set you can start the bump steer process. It is best to let the driver turn the wheel verses having them turn themselves over the bumps so I recommend running .002 out on the RF and .005 out on the LF . Setting the bump is time consuming but it pays back in consistent performance.
Ride Height
I set the car on stands and use set up blocks to get the car up in the air with the wheels held at my ride height position. I do this on a level spot and mark the 4 tire locations on the floor so I can be sure the process is the same. If my floor is out of level I have already spent the time to shim the floor so everything is spot on. I spend the time to get the heights exactly right. Make sure to start with the race air pressure you plan to run along with your desired stagger.
Caster/Camber
Setting the caster and camber before stringing the right side allows you to line up the RF and RR Contact patches while taking your camber setting into consideration. A billet caster camber gauge has the machined precision needed for repeatable and accurate measuring.
Set the Front End
I set the lower control arms perpendicular to the frame and make sure there is a straight line that runs from the outer lower ball joints through the inner pivots. I then set the caster at the top as it seems most late models have the a-plates moved back to allow for adjusting on caster at the A-arm.
I then set my camber and adjust the toe with the car up on set up stands. From experience I would set the toe 1/16th in while on set up blocks because when weight was applied it seemed to come out about right. With the toe set, I would get going on the bump steer. I re-check the toe after I put the weight on the car and if I move the toe I re-check the bump steer. When weight is applied I’d get close to my 1/32 of toe out. Personally, I run .002 out on the right and .005 out on the left which is not much so I spend the time to get it right. It is okay if you use different numbers but because I chose to run a very small amount I made sure it was right and kept working until I hit those numbers exactly. Many car builders/chassis guys recommend more bump out and the amount you run is fine as long as it is repeatable and you understand what happens to the car under varying conditions. For me, I like the driver to turn the wheel and I see zero benefit of the tires turning themselves over the bumps. Most of our short tracks are rough thus my “choice” to run nearly zero bump steer.
Digital Gauge
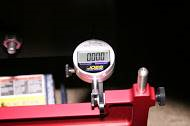 Using a digital gauge for bump steer gives you accurate readings with out the need for doing math or watching 2 needles wind around wildly. This gauge has a reverse display for easy viewing and the billet tool is superior to sheet metal and tubing.
Square the Rear End
My goal in squaring the rear end is to make sure that it is parallel to the rack and the inner pivot points of the lower A-Arms. I choose to run the lower control arms perpendicular to the chassis and make my caster adjustments on the top. In the end, the rear end needs to be square to the chassis and common sense prevails. I do square to the inner pivots at the front to eliminate the bends found in the mild steel that your car has been made from. Of course we start with a rear end housing that is straight.
First I clamp a perfectly straight edge to the bottom of the car 90 degrees to the straightest frame rail at the midpoint in the wheelbase. I verify that my inner pivots are parallel to the rack. On occasion I have to space the inner pivots a bit to account for frames that have bows in the mild steel. In the end, the Inner Pivots are parallel to the rack and the rack is exactly perpendicular to the frame. The Inner Pivots must be parallel to the rack or setting the bump steer will become a compromise.I spend a ton of time getting my straight edge parallel to the Inner Pivot Line. Once I know my reference straight edge is parallel I make sure it is 90 degrees to the frame allowing for the frame bows that are common. The frame rails are for reference and on average are square but I square to the front Inner Pivots and the straight line I created from that extends through the inner pivots through the outer lower ball joints. By squaring to the inner pivot reference line I am removing the variable of bows in the frame rails. With my straight edge perfectly located, I make peen marks in the bottom of the frame so I can set up my straight edge quickly next time. The marks come in handy when you need to check things at that track as I always carry the straight edge with me. While I maintain square to the frame I go the extra mile to and use the front inner pivot reference line.
I set my trailing arm lengths and adjust my trailing arm and top link angles. I set the J-bar heights and lock everything down. I line up the right side and ensure that my trailing arm and top link angles are correct. Most car builders line up the right side but you need to verify as if they want the RR set in 1/2” or something then you need to set the housing there to make sure your trailing arm angles line up with the brackets as intended by your car builder.
Toe Plates
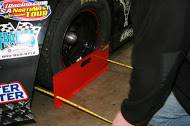 Toe plates make quick work of setting your toe. With today’s precision components I recommend running less toe out as compared to the past. If you have a rack and quality rod ends I would run 1/32nd or toe out to 1/16th of toe out. 1/8″ or 3/16ths was the standard before but with better components we can run less and reduce rolling resistance for more speed.
Line Up the Right Side
Now that I have the straight edge to rely on I can quickly hook my tape and for fast 1 man measurements. I then set up a string on the right side of the car and line up the right side tires. I set the string at my frame height – some people do this different but frame height is something I can repeat the process and the method gets the contact patches in line. I set the RF straight and move the housing until all the string touches all 4 sidewall points on the right side. This method takes into account the camber setting you choose to run in the RF.
With the right side lined up I hang plumb bobs behind the housing as far out near the hubs as possible. A nut on the end of a string will work fine to hold the string tight. I hook my tape on the straight edge making sure the tape is running 90 degrees to the straight edge and take a measurement at each hanging string. I adjust as needed and check again. I repeat until I have it right on. Some people stop when they get within 1/32nd. I keep going until it is right on! Once I have everything tight and the rear end is square to my reference straight edge I recheck my right side string. If the right side no longer lines up then I move the housing until it does and start the rear end squaring again. Sometimes you have to go from the right side string to the rear end square-ing multiple times. I only stop when the right side is lined up and the housing is exactly right.
Once complete I take an adjustable carpenter’s square and measure from the under slung frame rail to the RR brake rotor and record the number in my set up book. As long as the car isn’t bent I can get the left to right location with a quick measurement. By using the adjustable carpenter’s square, I have a nice quick check method to keep the housing located properly when track changes get fast and furious. The brake rotor is a straight and reliable reference point so the results are repeatable.
Moving on I get the lead in the car and set up my shocks and springs. Of course the car is already full of fuel and fluids. Once the car is at the minimum legal weight I move the lead until I have reached the allowable left side and my desired rear weight. For late models I set the lead and all weights with the driver in the car.
I set the stagger and adjust the wedge making sure the ride heights match what was used on my set up blocks. Every possible adjustment is recorded on my set up sheet and when I reach the track all changes are noted. At the end of each event I review my changes and record my thoughts about their success. I highlight adjustments where I felt I learned something new or if I overcame a particular problem successfully. I track my less than perfect decisions too as it is another opportunity to learn. I place my review comments in the same place in my set up book as over time I can review the notes and my knowledge base continually changes based on race experience.
Review
- Set the ride height on set up stands
- Set front inner pivot line straight through the lower ball joints
- Set the caster at the top
- Set the camber
- Set the toe
- Set the bump steer
- Set the trailing arm and top link angles
- Set the j-bar heights
- Line up the right side – recheck the trailing arm angles
- Square the housing to the inner pivot line
- Load and adjust the lead – left side and rear weight
- Install the springs and shocks
- Set the stagger and air pressure
- Set the ride heights
- Set the wedge
- Double check the front toe and adjust bump steer if needed.
- Set the sway bar
Remember to understand and record your changes. When you win you will know how you got there and will find your way to victory lane again. Answer Jim’s question along the way and the monkey’s will stay clear of your back and jump on the backs of those that make accidental choices. A plan to win prevails and is a “choice” that is yours to make.