Have you ever driven a forklift or other hot rod that had the steer wheel in the back instead of the front? Rear steer rigs turn quickly and the term “push” just would never apply. Understanding your three link suspension can give you adjustment tools to help you roll through the center of the turn or help to hook you up on exit.
In general your static rear setting should be dead square. In your shop you need to spend the time needed to ensure that your rear end is exactly square. Once your rear end is square it helps to record the measurement from the brake rotor to the frame as well as from the trailing arm brackets to the frame both left and right. Keeping these measurements on hand will allow you to make track changes with the confidence that you are maintaining a square rear end setting.
All of my shop set ups include a rear end that is absolutely square. It is always my goal to maintain a square rear end and use all the other adjustments to find the right set up. I always feel that changing the square is a crutch that can create late race handling problems and potentially make your late race tires under perform.
Often moving the RR ahead cures the loose in condition but you run the risk that the fix is short term. It is possible that you could get a late race center push or the loose in condition could return after the tires heat up and wear a bit.
While I try to avoid messing with the rear end square it is an amazingly effective adjustment. Drivers always provide instant feedback and a rear end square adjustment is felt instantly. If you have a car that is loose then that condition must be fixed. Drivers can adjust their line for a center push or exit loose but entry loose means you simply have to lift sooner.
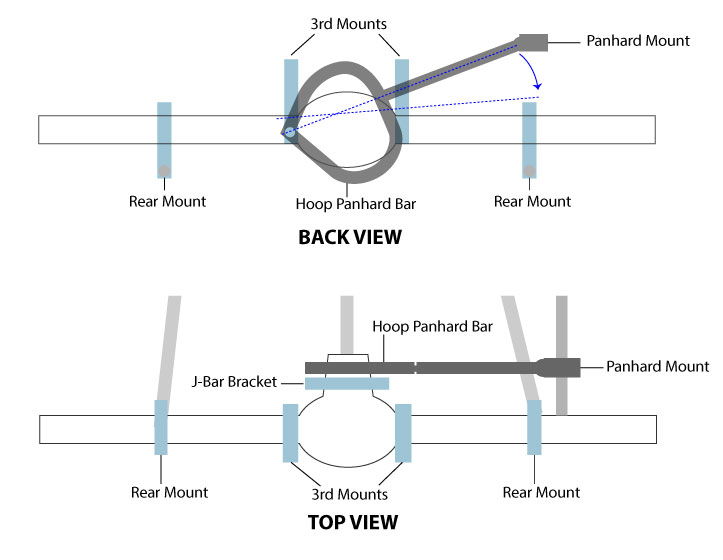
If you toe in your trailing arms at the front you can use the Hoop Panhard Bar or J-Bar to help over steer the rear end to cure a push in the middle. In this example, mounting the frame side of the Panhard Bar higher than the pinion side moves the rear end housing to the left as the chassis rolls. As the housing moves left the RR trailing arm gets longer and the RR tire moves back helping the car to turn.
If I have exhausted my reasonable loose in adjustment ideas I might choose to shorten the RR trailing arm an 1/8” to help cure the loose in condition. Often moving the RR ahead cures the loose in condition but you run the risk that the fix is short term. It is possible that you could get a late race center push or the loose in condition could return after the tires heat up and wear a bit. Experience at a given track plays a big role here.
On some days it seems that the push in the center won’t go away. Again, I try to avoid messing with the rear end square and go through all of my other ideas before moving away from square. To place this concept in perspective I would say 95% of the races I have ever been around in involved a square rear end. I would say I got a nice handling improvement about half the time that I moved the rear end and saw some or little improvement the other half. Hey, sometimes you miss the setup and it is what it is.
If the car has a push in the center then I might shorten the LR trailing arm 1/8”. It would be rare that I would recommend going more than an 1/8” and really I will stick with the thought that square is best 95% of the time – maybe even 98%.
You can think out your rear link setup and by understanding how and when the car rolls, you can use the trailing arms to help dial in your setup. When using trailing arm angles to help your setup it pays to truly understand the movements at each section of the corner as well as think about any drawbacks that rear steer or understeer might create.
To help the car turn through rear steer you can run the RR trailing arm uphill a 1/2”- 1” at the front. As the car rolls the RR trailing arm will push the rear end housing back on that side. The uphill RR trailing arm adds anti-squat to the car which helps forward bite under acceleration so I like to run some uphill angle in the RR trailing arm. Maybe a 1/2” up is a starting point.
Panhard Mount
 To really add over steer at the rear end housing you can mount the front pivot point of the RR trailing arm towards the center of the car. With the trailing arms toed in at the front you can use the J-Bar mounting angle to help steer the rear end through roll. If you run the frame side of the J-bar is higher than the pinion side the rear end housing moves left through roll. As the housing moves left the RR trailing arm gets longer and pushes the RR tire back producing rear steer that will help the car turn.
If you want the rear end housing to under steer then mounting the RR trailing arm level and perpendicular to the rear end housing will produce the desired result. As the car rolls the RR Trailing are will shorten pulling the RR tire ahead.
When it comes to trailing arms I try to avoid linkage arrangements that go though center under roll. In other words – if the trailing arm starts on an uphill angle I do not want it to go past level and then head downhill. If the travel was enough to create a down hill angle under full roll I would make an adjustment as this can make the care unstable. I want to avoid having the RR tire to move back and avoid having the trailing arm travel through level which would cause the RR to begin moving forward.
Typically, I like run the LR trailing arm up hill about ¾” to 1”. There is much debate on this but I like to have a little anti-squat in the car to promote bite under acceleration. If you run a high amount of wedge then level may be a better idea. Since the left side is lifting in the corner the angle increases and the LR trailing arm shortens and keeps moving in the same direction. Again, when it comes to trailing arms I try to avoid linkage arrangements that go though center under roll as going through center can create an unstable car.
Mounting the LR trailing arm with the inner pivots towards the center of the car coupled with the J-Bar running downhill from the pinion to the frame will pull move the LR tire back during roll promoting under steer.
By thinking out the trailing arm angles in conjunction with the J-Bar angle you can guide the rear end housing on the path that helps your set up through the turn. Running the J-Bar higher on the frame side will push the rear end housing to the left through roll. If you run the frame side lower or level the rear end housing will move right through roll. Using the J-Bar mounting angle to in conjunction with trailing arm angles both up and down and left to right gives you another tool in your arsenal helping you to achieve faster lap times.
Slotted Pinion Mount
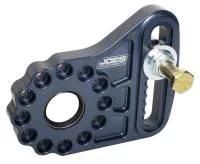 A slotted pinion mount allows you to quickly set the J-Bar angle. Running the J-Bar higher on the frame side as compared to the pinion side moves the rear end to the left through chassis roll. Understanding how the rear end moves gives you adjustment options to dial in your set up for added speed.
Using trailing arm brackets with multiple trailing are mounting holes gives you additional adjustment options. The clamp type aluminum brackets allow you to mount the trailing arm left to right mounting location where ever you want. You can fine tune the trailing arm location and trailing arm toe settings by using spacers to set the left/right angle to meet your needs.
Clamp-On Aluminum Trailing Arm Brackets
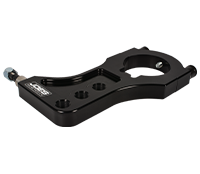 Clamp on aluminum trailing arm brackets allow you to set the trailing arm angles to help your car turn through the center. You can arrange your three link set up for over steer or under steer through chassis roll. Experienced crew chiefs use the three link set up as part of their set up package.
I recommend running the top link with a fair amount of anti-squat built into the adjustment and a downhill angle of around 4 to 7 degrees. If you run a track where the car is tough to hook up you can get some added bite to the LR under acceleration if you mount the top link closer to the LR wheel. If a track you run is consistently tight then mounting the top link closer to the RR will free the car up under acceleration.
Top Link Mounts
 A top link mount that is slotted will allow for ultimate fine tuning of your top link anti-squat settings. Top link mounts with multiple holes also work well. Adjusting the anti-squat for your car, driver and track can maximize exit grip getting your team to the finish line first.
Top link mounting ears with multiple holes or slots will give you more room for adjustability. You can choose mounting ears that have the adjustment holes offset behind the center line of the rear end housing which will add more anti-squat under acceleration. Keep in mind that anti-squat only takes advantage of the available grip through the use of mechanical leverage. Excessive amounts can cause a loose in condition or wheel hop. Occasionally the driver might report that the front wheels feel light under acceleration at the late apex point – if so you should dial back the top link angle and anti-squat for driver feel.
As a general guideline – more anti-squat in your three link suspension works best if you run low amounts of wedge. As wedge numbers increase then you should consider lower amounts of anti-squat. Again, you can make adjustments based on your set up. I prefer low amounts of wedge in an asphalt late model and most of the races that landed my teams in victory lane had 49% to 53% of diagonal. Based on those lower wedge settings I would run a fair amount of anti-squat. Typically, I would run the LR trailing arm up an inch on the front. By using the trailing arm with plenty of angle I could reduce the angle in the top link creating a more stable entry while maintaining the anti-squat I desired. If you run 60% diagonal then running the top link and trailing arm closer to level is a good starting point.
Using your three link suspension to dial in your car is a viable adjustment option that can be performed quickly right at the track. The teams that experiment with the proper three link set up can find the set up that launches their car off the corner with more acceleration to get to the checker first.